How to Make a Wedding Invitation: 8 Easy Steps

Learning how to make a wedding invitation becomes easier when you separate the work into small decisions. First confirm the celebration details, then choose a design, personalize the wording, check the layout, and prepare the finished file. You do not need to begin with an empty page or use every decorative element you like.
This guide explains how to make a wedding invitation through eight practical steps, with an illustration for each stage and real wedding templates from Kikliy. Whether your celebration feels romantic, traditional, coastal, or modern, the aim is the same: create something beautiful that gives guests clear information. The stationery photographs illustrate the process; the linked template previews below show actual designs available on the website.
If you want to understand how to make a wedding invitation without missing a stage, work through the steps in order and approve the information before printing.
Step 1: Gather the wedding details before designing

The first part of how to make a wedding invitation happens before you choose flowers or fonts. Open a document and collect the couple’s names, event date, ceremony time, venue name, full address, reception arrangements, and RSVP contact. Ask both partners to approve these details so you are not designing around information that might change.
Decide who is inviting the guests. The wording might come from the couple, their families, or named hosts. Check how each person wants their name written, including titles, spelling, and any cultural or religious wording. If different ceremonies take place on different days, give each event its own clearly labeled information.
When planning how to make a wedding invitation, distinguish essential information from supporting details. Guests need to know what the event is, who is celebrating, when to arrive, and where to go. Parking instructions, accommodation, meal preferences, and longer travel notes can sit on a separate details card or wedding information page.
Keep an invitation list alongside your notes. Count households or invitation groups rather than assuming every guest needs a separate printed card. Add a small number of spare copies for keepsakes and last-minute additions. Knowing the quantity helps you compare printing options before you commit to an elaborate stationery suite.
A useful habit when learning how to make a wedding invitation is to mark every unconfirmed detail. Do not publish or print while the venue or time is provisional. Once the information is approved, save one master copy. That simple reference makes how to make a wedding invitation much more manageable when you begin editing.
Your first checkpoint in how to make a wedding invitation: confirm every event detail.
Step 2: Choose a style that suits the celebration

The creative part of how to make a wedding invitation starts with the atmosphere you want guests to imagine. A garden celebration might suit watercolor greenery, while a modern city wedding could use a clean layout with strong typography. Choose a style that feels connected to your venue and the way you want the day to feel.
Select two main colors and a neutral background before browsing too widely. Sage and ivory, dusty blue and white, or terracotta and cream offer different moods without requiring many competing shades. Look at the colors together in daylight, then consider whether the text will remain easy to read against the background.
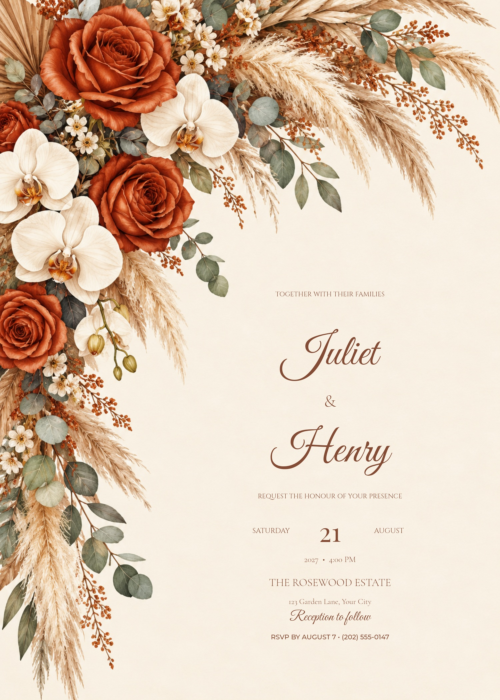
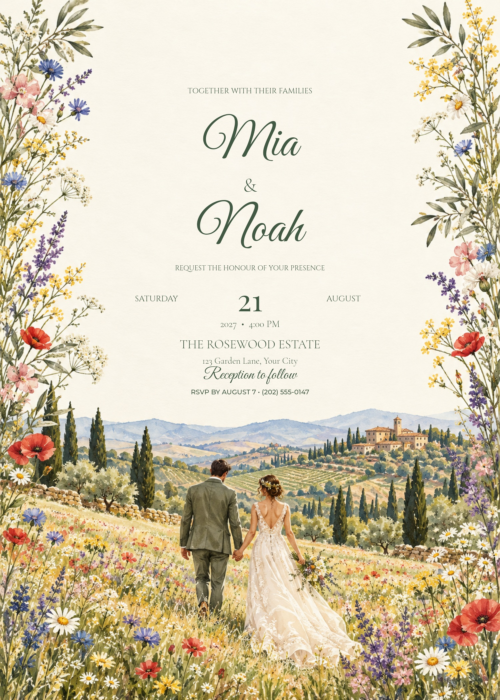
If you are exploring how to make a wedding invitation with a romantic look, compare the Regency Garden and Tuscan Wildflower previews below. For warmer earthy styling, consider Terracotta Boho. A coastal itinerary design may suit a seaside celebration with several planned activities. Use these designs as starting points rather than mixing all their decorations together.
Consider cultural meaning as carefully as appearance. A dragon and phoenix design, for example, carries a different visual tradition from a botanical garden invitation. Choose motifs that belong in your celebration, and ask someone familiar with the tradition to check any specialist wording, symbols, or language before sharing the finished design.
Save one favorite style and one backup. This limits repeated redesigns and helps both partners make a clear decision. Understanding how to make a wedding invitation includes knowing when the visual direction is settled. With that choice made, how to make a wedding invitation becomes a practical editing task instead of an endless search.
Your style checkpoint in how to make a wedding invitation: settle on one visual direction.
Step 3: Select a template and confirm the size

An editable template makes how to make a wedding invitation less intimidating because the main composition already exists. Visit Kikliy’s invitation collection, open a wedding design you like, and examine its preview before starting. Check that there is enough space for your names and event details without squeezing extra lines between decorative elements.
Choose the delivery format early. A portrait card around 5 by 7 inches is one familiar option for printed invitations, but the final size should match the printer’s requirements and your envelopes. For digital sharing, a portrait layout can work well on a phone, provided the essential text is readable without zooming.
Before deciding how to make a wedding invitation for print, ask your printer about finished dimensions, bleed, safe margins, paper, and accepted file types. Bleed is artwork extending beyond the cut edge; it is not the space where important text belongs. Follow the printer’s exact specifications rather than assuming one setting suits every supplier.
Keep a working version of the template before experimenting. If you change the page size, inspect every text line and decoration afterward. Resizing can alter spacing, crop borders, or leave a name too close to the edge. Avoid stretching an exported image to force it into a different card shape.
This stage of how to make a wedding invitation should end with a settled format, a suitable template, and a clear output plan. If you need both print and phone versions, prepare them as separate final files. That approach keeps how to make a wedding invitation flexible without compromising the quality of either version.
Your format checkpoint in how to make a wedding invitation: match the size to delivery.
Step 4: Write clear invitation wording
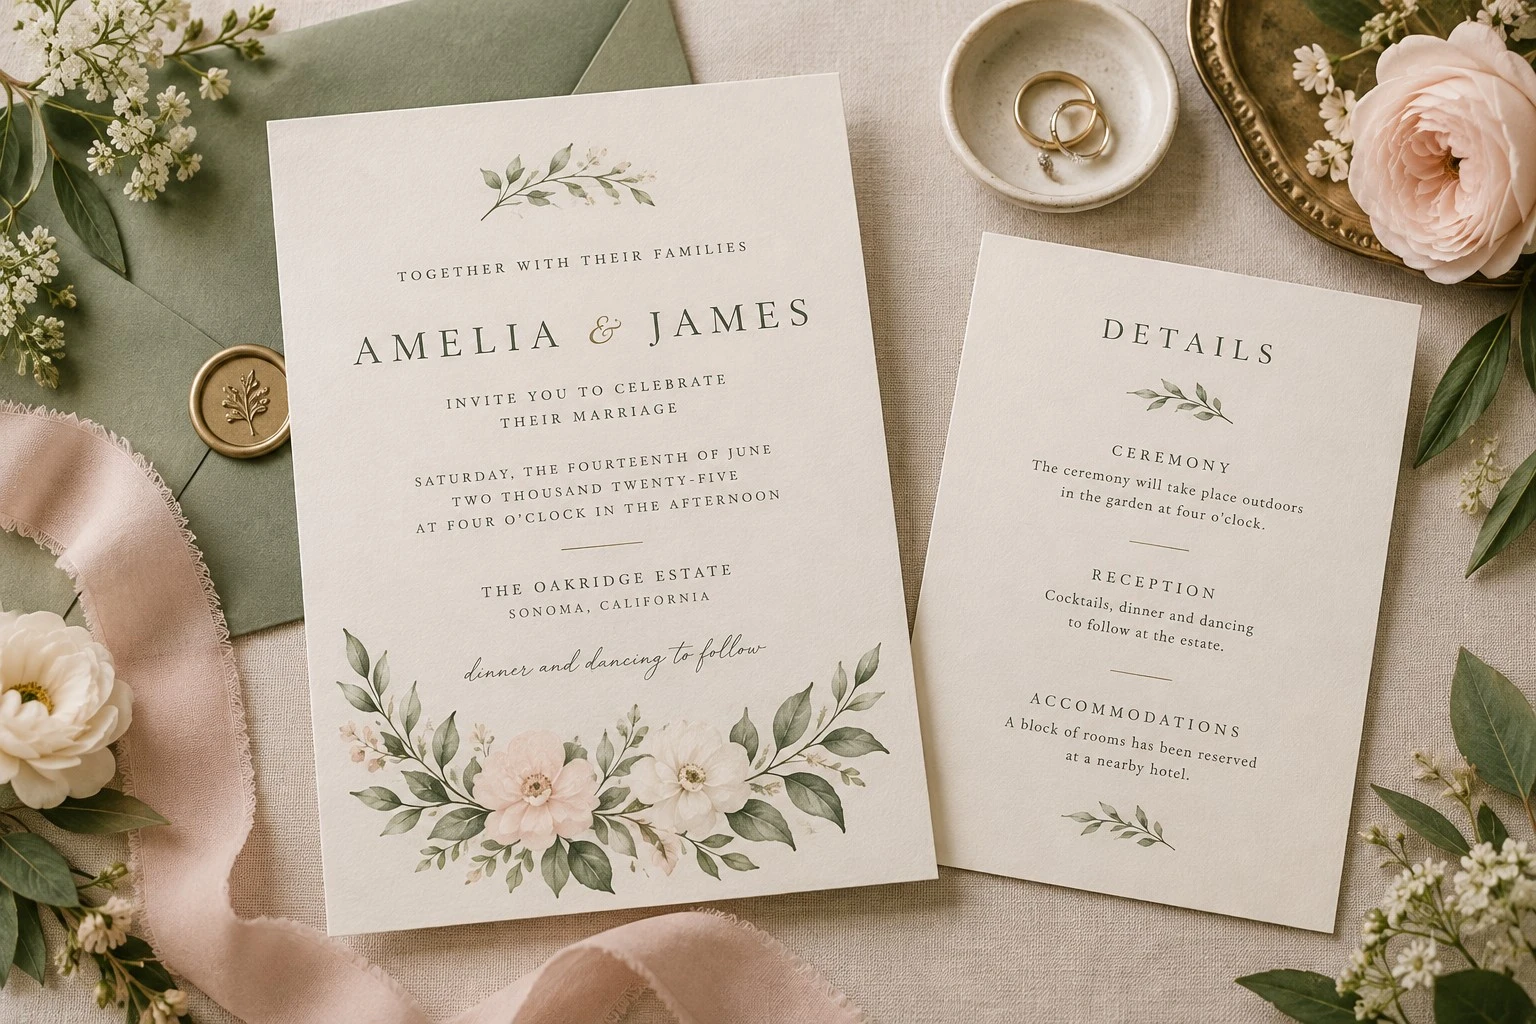
Knowing how to make a wedding invitation includes writing words that sound like you while answering your guests’ practical questions. Begin with a short host line, introduce the couple, invite the reader to the celebration, then give the date, time, and location. Place the RSVP instructions where guests can find them easily.
For a relaxed family-hosted celebration, you might write: ‘Together with their families, Amelia Rose and James Bennett invite you to celebrate their wedding on Saturday, 18 September 2027, at 4:00 p.m., at Willow House, 25 Garden Lane, Bristol. Reception to follow. Kindly RSVP by 18 August to Amelia.’ These are fictional sample details; replace every item before using them.
If you are deciding how to make a wedding invitation more formal, use a consistent tone throughout. Avoid combining a very traditional opening with unexplained abbreviations and casual instructions. Write the date unambiguously, especially if guests live in countries that arrange numeric dates differently. Specify the arrival or ceremony time accurately.
Give separate events separate labels. If the ceremony and reception use different venues, show both locations or place the reception information on a matching details card. If only some guests are invited to an additional event, create the appropriate version rather than sending everyone an invitation that needs a private explanation.
Read your wording aloud before styling it. Remove repeated phrases and anything that makes the main message harder to understand. A clear sentence often improves how to make a wedding invitation more than another ornament. Save the approved wording separately so future changes to how to make a wedding invitation do not accidentally replace correct information.
Your wording checkpoint in how to make a wedding invitation: replace all sample details.
Step 5: Personalize fonts, colors, and decorative elements

Personalization is where how to make a wedding invitation begins to feel individual. Replace the sample names first, then enter the approved date, venue, and RSVP details. Work through every text box systematically. Do not assume that changing the large names has also removed sample information from a small footer or matching card.
Use a readable font for the practical information and, if you like, a decorative font for the couple’s names. Two complementary typefaces are usually easier to manage than several unrelated styles. Check difficult letter combinations, especially in script fonts, because a beautiful capital letter can make an unfamiliar name harder to recognize.
When learning how to make a wedding invitation with soft colors, keep contrast in mind. Pale blush wording on ivory may disappear when printed or viewed on a small screen. Try a deeper version of the same color for the essential text. Decoration can remain delicate while the names, date, and location stay prominent.
Add artwork selectively. You can explore Kikliy’s PNG collection for suitable floral or decorative elements, but check each asset’s usage terms before using it. Keep the illustration style consistent: one watercolor border often looks more intentional than a combination of watercolor flowers, glossy icons, and heavy geometric frames.
Look at the entire card after each major change. If the design feels crowded, remove an element before reducing the text size. This is a useful rule for how to make a wedding invitation that remains readable. The best answer to how to make a wedding invitation is a balanced design that supports the message.
Your design checkpoint in how to make a wedding invitation: keep essential information readable.
Step 6: Refine the layout and proofread everything

The checking stage of how to make a wedding invitation deserves its own time. Start with visual hierarchy: guests should notice the couple’s names, recognize the occasion, and locate the date and venue quickly. Give related information enough space to form clear groups. Avoid filling every empty area with decoration.
Check alignment and line breaks at normal viewing size. A centered design should feel consistently centered; a left-aligned design should use a dependable starting edge. Keep the date together where possible, and avoid leaving a venue’s final word alone on a new line. Move or resize the text box rather than inserting random spaces.
Proofreading is essential to how to make a wedding invitation because small errors can create real confusion. Compare every name, address, and time against your master notes. Check that the written weekday matches the chosen calendar date. Confirm the RSVP deadline, contact details, and any ceremony or reception distinctions with the relevant people.
Ask a second reader to review the invitation without coaching them. Can they explain where to go, when to arrive, and how to respond? Their questions reveal information you may have assumed was obvious. For bilingual invitations or religious text, ask a fluent reader to check both wording and the way characters display.
Finally, inspect the corners and trim area. No important wording should sit against the edge, behind flowers, or underneath a decorative frame. Treat this approval as part of how to make a wedding invitation, not an optional finishing touch. Pause changes once approved, and restart the checks if how to make a wedding invitation requires a later edit.
Your approval checkpoint in how to make a wedding invitation: ask a second reader.
Step 7: Download the design and test the print

Exporting is another important part of how to make a wedding invitation. Use a file type suited to the destination rather than downloading the smallest file available. For professional printing, follow the supplier’s requested PDF settings. For digital sharing, choose an image or document format that preserves readable text on the devices your guests use.
Open the downloaded file outside the editor before approving it. Check that the fonts, artwork, page dimensions, and colors appear as expected. Zoom in to inspect edges, then return to normal size to judge readability. An exported file may reveal a clipped line or missing detail that was less noticeable while editing.
If you are learning how to make a wedding invitation for home printing, produce one test copy first. Use the intended paper where possible and check the printer’s scaling settings. A ‘fit to page’ option can change the final size, so compare the printed result with your planned dimensions and envelope before making the full batch.
For a print shop, ask for a proof and confirm whether the quoted service includes trimming. Screen colors and printed colors can differ, especially with very pale backgrounds or dark saturated areas. Judge the proof in ordinary lighting and check that the paper can reproduce the details without making the practical text difficult to read.
A successful test completes the technical side of how to make a wedding invitation. Save the approved export with a clear filename and keep the editable original separately. If you correct anything after the proof, export and check again. Reusing an older file can undo the care you put into how to make a wedding invitation.
Your export checkpoint in how to make a wedding invitation: approve the downloaded proof.
Step 8: Share, assemble, and track the invitations

The last stage of how to make a wedding invitation is getting the approved design to the right people. For printed invitations, place one complete set in an envelope and check the fit before assembling everything. Confirm names and addresses against the guest list, and keep different invitation versions clearly separated.
For digital delivery, send the final invitation to yourself first. Open it on a phone and check whether the event details remain legible. Some messaging services compress images, so consider sending the original file as a document when that preserves quality better. Include a short personal message and a clear way to RSVP.
If you are considering how to make a wedding invitation with a QR code, use it for helpful extra information rather than replacing the essential details. Kikliy’s QR generator can help prepare a code for your chosen destination. Test the final exported and printed code on another device, and keep its destination accessible to guests.
Maintain a simple response tracker with the invitation group, delivery date, reply status, and any information you requested. Contact guests privately if a reply is missing or unclear. Avoid putting sensitive guest information into a publicly accessible document just because it is convenient to share the invitation link.
Keep one final digital copy and a printed keepsake if you would like one. This closes the process of how to make a wedding invitation with less confusion and fewer repeated messages. Once the files, deliveries, and responses are organized, how to make a wedding invitation becomes a finished task you can confidently cross off your wedding list.
Your delivery checkpoint in how to make a wedding invitation: test before sending.
Explore real wedding invitation templates on Kikliy
Choosing a starting design is part of how to make a wedding invitation. These previews come from Kikliy’s template collection. Select a preview to open that specific invitation and explore its design.



Your final wedding invitation checklist
Before finishing how to make a wedding invitation, use this checklist on the exact file you plan to print or send.
- Both partners have approved the names and wording.
- The weekday, date, time, and venue address are correct.
- The ceremony and reception arrangements are clear.
- RSVP contact details and the deadline are included.
- All sample wording has been replaced.
- Fonts, contrast, and spacing remain readable at normal size.
- The export matches the printer’s or delivery platform’s requirements.
- A printed proof or phone test has been reviewed.
- Links and QR codes work on another device.
- The approved export and editable original are saved separately.
Frequently asked questions
How to make a wedding invitation online as a beginner?
Begin with one editable wedding template rather than a blank canvas. Enter your approved event details, choose readable fonts, and adjust only the colors or artwork needed to match your celebration. Review the final design on a phone and in a test print. Keep your first version simple so you can concentrate on correct information and balanced spacing.
How to make a wedding invitation look elegant on a budget?
Use consistent typography, a restrained color palette, and one strong decorative theme. A carefully spaced design on suitable paper can look polished without multiple inserts or elaborate finishing. Compare the complete cost of printing, envelopes, trimming, and postage before deciding which extras matter most. An editable template can reduce the work involved in building the layout.
How to make a wedding invitation suitable for both print and WhatsApp?
Keep the same visual theme but check each delivery format separately. Use the printer’s required export for the printed card, and create a version that is easy to read on a phone for messaging. Test the actual downloaded files instead of relying only on the editor preview. Keep the date, location, and RSVP instructions visible in both versions.
What information belongs on a wedding invitation?
Include the couple’s names, an invitation line, the event date and time, venue details, and clear RSVP instructions. Add the hosts where appropriate. Explain separate ceremony and reception arrangements clearly. Longer travel notes, accommodation details, and other supporting information can go on a matching card or an accessible information page rather than crowding the main invitation.
Can I change a template after choosing it?
You can personalize an editable design within the features offered by its editor. Before starting, check the specific template and available controls. Keep an approved wording copy and inspect the layout after changing text, size, or decorative elements. A longer name or different venue address may require new line breaks even when the original template looked perfectly balanced.
What is the most important final check?
Compare the finished export against the confirmed event details, then ask another person to read it. Check spelling, date, time, location, RSVP instructions, and readability. For printed cards, approve a physical proof before ordering the full quantity. For digital invitations, open the delivered file on another phone and test any included link or QR code.
Start creating your wedding invitation
Now you know how to make a wedding invitation from the first planning notes to the final delivery. Choose a style you love, keep the information clear, and give the proof a careful review. Explore Kikliy’s invitation templates to begin your design.